InDesign tips
Below are page layout and typesetting tips for InDesign I’ve learned along the way since the days QuarkXPress was the top software for this type of work.
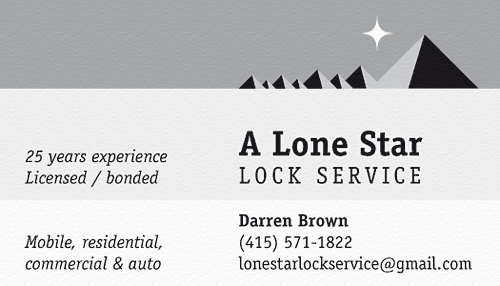
I’ve used InDesign for dissertations, brochures, business cards, posters, flyers and many other things made with type including photo books and insomnia-curing documents with hundreds of pages for large organizations.
Accessible PDFs
Learn how to make accessible PDFs so they can be read widely.
Automatically create pages from pasted text
Say you have a long list of names to add to certificates.
You want one name per page with the same background.
- Create new document with Primary Text Frame check box ticked.
- Menubar: Window → Pages → double-click on A-Parent
- Click on the primary text frame, resize and style it the way you like. Consider setting a style.
- Double-click page A-1, then, Menubar: File → Place (Cmd+D), and select the text file you have the text you want to place, such as
participants.txtcontaining a long list of names. - Click once on the primary text frame on page A-1, and wait, since depending on how large the text file is it may take some time for the automatically added pages to appear.
Basic paragraph style
Don’t use it. Set your own, and make sure it is not based on [Basic Paragraph], for the sake of other designers you send your file to.
Bold and italic shortcuts
Shift+Cmd+I = Italic
Shift+Cmd+B = Bold
CMYK and RGB

Understand the difference between CMYK (print) and RGB (screen) color.
Print rich black (and brown) colors in CMYK print.
Standard Black ~ C:0 M:0 Y:0 K:100
Rich Black ~ C:20 M:20 Y:20 K:100
Deep Black ~ C:60 M:40 Y:40 K:100
For print projects don’t forget to work in CMYK and convert all colors to CMYK before packaging your project to send to the printer.
Talk to your printer and ask for samples of the paper you will be printing on. The type of paper has an effect on color and typography. Once you’re more experienced and confident don’t be afraid to break the rules.
Colors look different on different screens. Accept this. If you don’t, and need to choose a color, get a lot of different screens in the same room all displaying the same color, then choose the color that looks best in all the screens at the same time.
Crash when editing table of contents (TOC)
Export the file as InDesign Markup (IDML), then open the IDML file and re-save as a regular InDesign file.
Find and replace using GREP
GREP expressions can be used to quickly find and replace specific strings of text or typography formats. You can ask AI tools like Claude to write them for you. Here’s an example.
Grid made quickly
Using the Rectangle tool (M) click and drag to draw a box, and without releasing the mouse button, press ↑ ↓ ← and → arrow keys to make a grid.
Drag multiple images from the Finder into your document and click and drag as above without releasing the button and use the arrow keys. The images will be loaded into the grid.
Hierarchy and styling of typography
Understand typography and its structure in the InDesign software:
A Story flows across many Text Frames that contain lots of Paragraphs made of Characters.
Use Parent Pages to create custom page styles for specific sections.

Style paragraphs and characters for consistency and the ability to change everything quickly when your boss decides we need Papyrus or Comic Sans instead of Garamond or Helvetica. Name your styles in a sensible manner, like Main Title Heading 1 Heading 2 Heading 3 Body Text Bullet list Number list Figure Caption Quotation Dropped Capital Hyperlink Smallcaps Sidebar Footnote, Small Text, and so on.
Use Space After under Paragraph Style Options → Indents and Spacing instead of hard paragraph breaks in the text.
Link to a page in the current document
- Select some text or an object you want to be the link
- Menubar: Type → Hyperlinks & Cross-References → New Hyperlink.
- Link To: Select Page from drop-down. Destination: Select page number to link to.
Math calculations in inputs
Any input box with numbers in it supports math functions so you can type things like 300/1.618 to get 185.414.
Optical margin alignment, hanging punctuation
Make your document’s typography look nicer by turning on optical alignment so that bits of odd letters and elements like curly quotation quotes align in a pleasant way:
- Menubar: Window → Type & Tables → Story Panel
- Check the Optical Margin Alignment checkbox.
Overset text error check in preflight
Find all instances of overset text in the document by going to Menubar: Window → Output → Preflight, then expanding the errors list and double-clicking on each error to jump to the relevant text box.
Preview without guides
Press W to switch between Normal and Preview screen modes.
Save locally and often
Save your document on your local machine often.
Make a backup copy of your work daily.
Selecting with clicks
1 click = character insertion point
2 clicks = select word
3 clicks = select line
4 clicks = select paragraph
5 clicks = select story

Variables for pages and dates
Use text variables which change automatically depending on the page you are on, the current date, etc.
Warm colors
Add a bit of yellow to a color such as red to make a warmer red.
Zooming and scrolling
Hold Alt while scrolling the mouse scroll wheel to zoom in and out.
Hold Shift while scrolling the mouse scroll wheel to scroll from side to side.
· ˖ ✦ . ˳
Come with me in creative journeys through music and play by subscribing to my YouTube and Twitch channels. ❤︎ Did you enjoy this post? You can buy me a moment of time.
Possibly Related:
˳ · ˖
Prior entry: Planetary aircraft detection analytic feed
Next entry: Daily habits